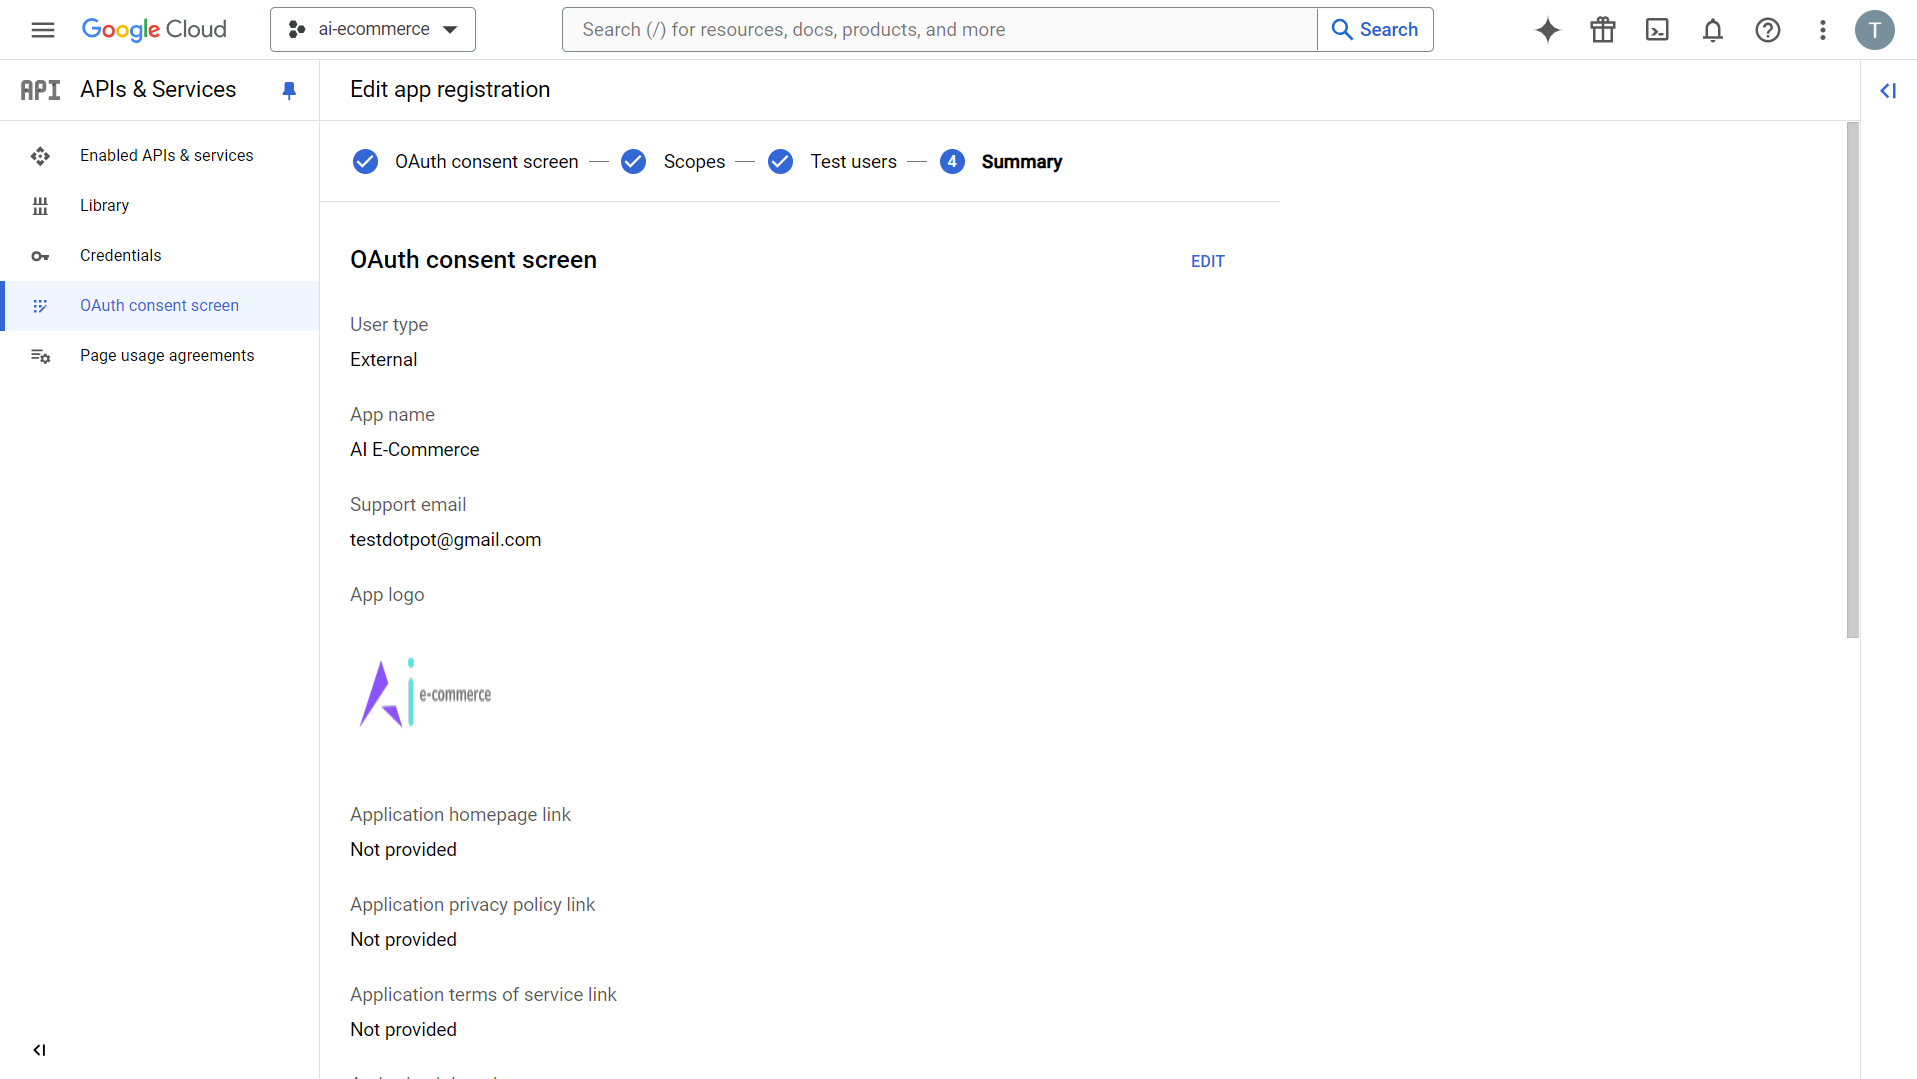
OAuth Consent Screen
The OAuth Consent Screen is an essential component for applications that require user authentication through OAuth with Google services. Follow the steps below to configure your OAuth Consent Screen:
Step 1: Configure App Information
-
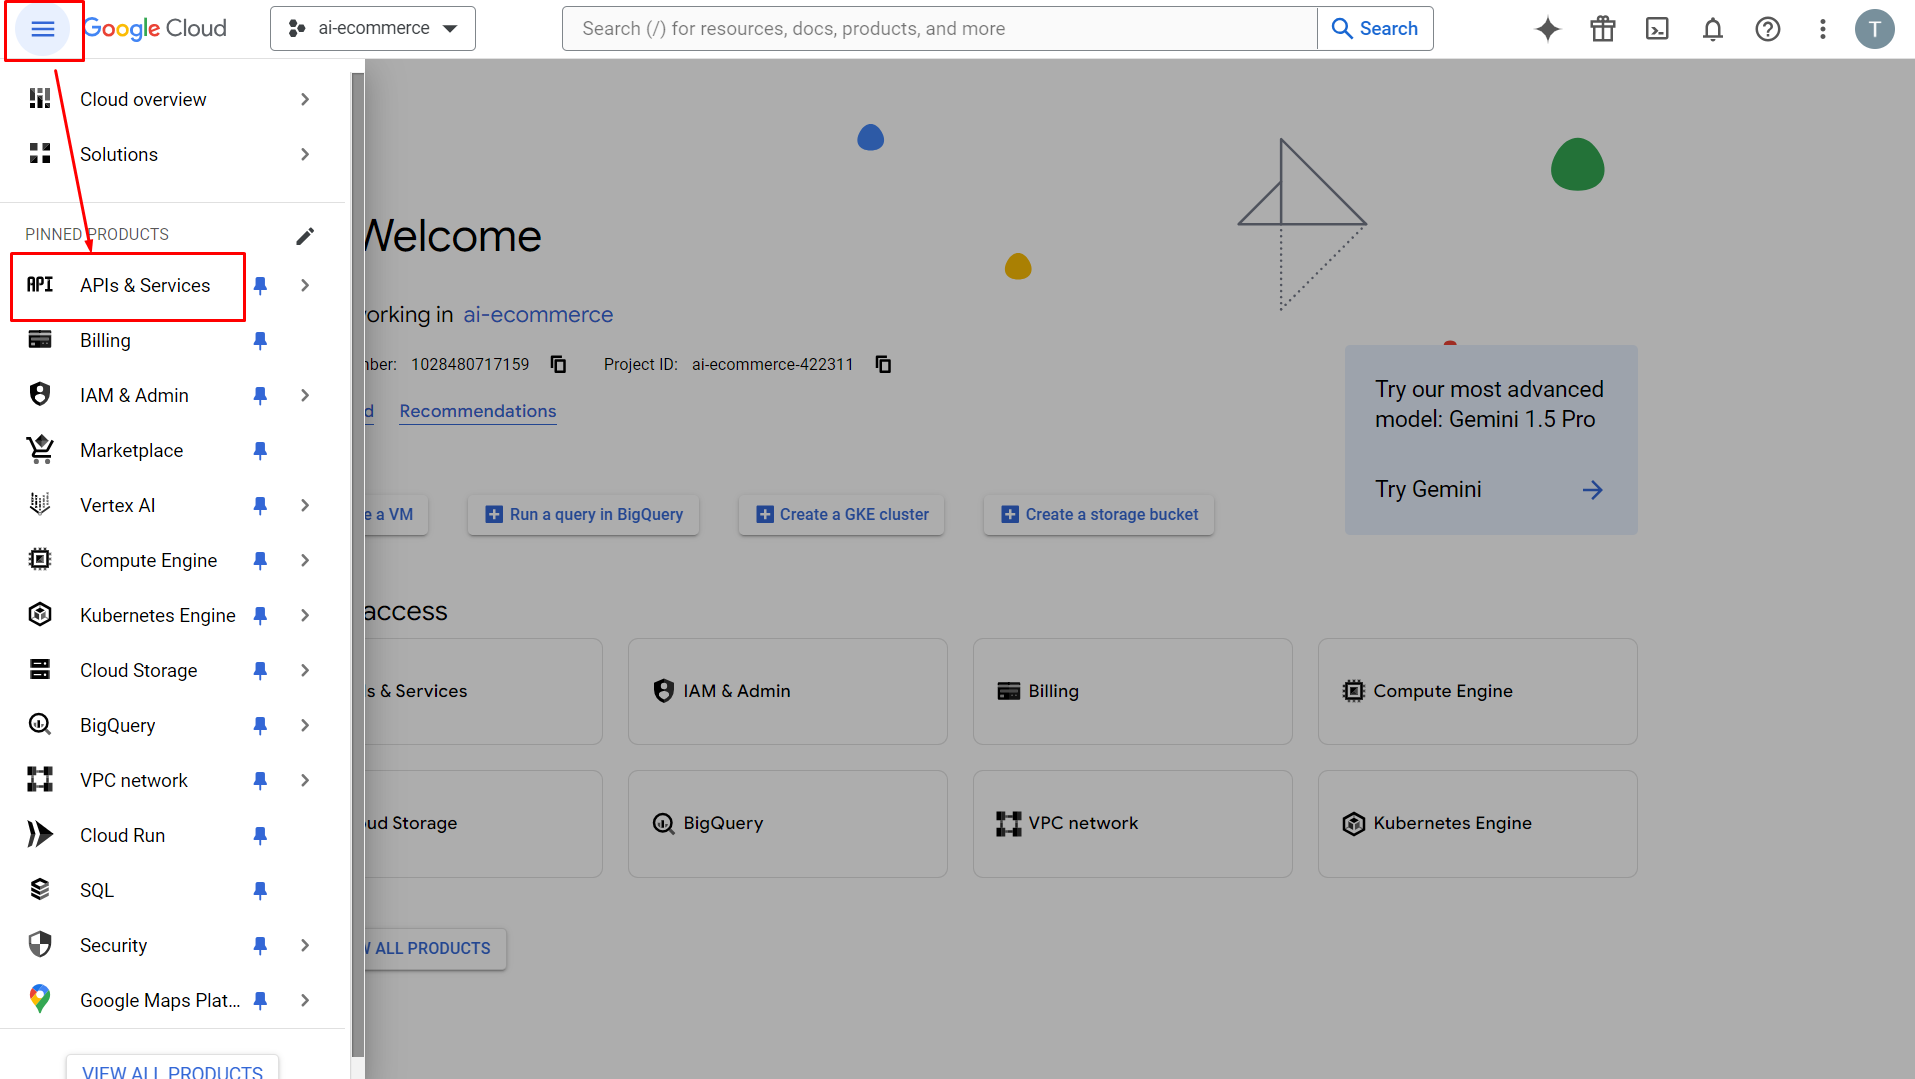
Click on hamburger menu then click on APIs & Services
-
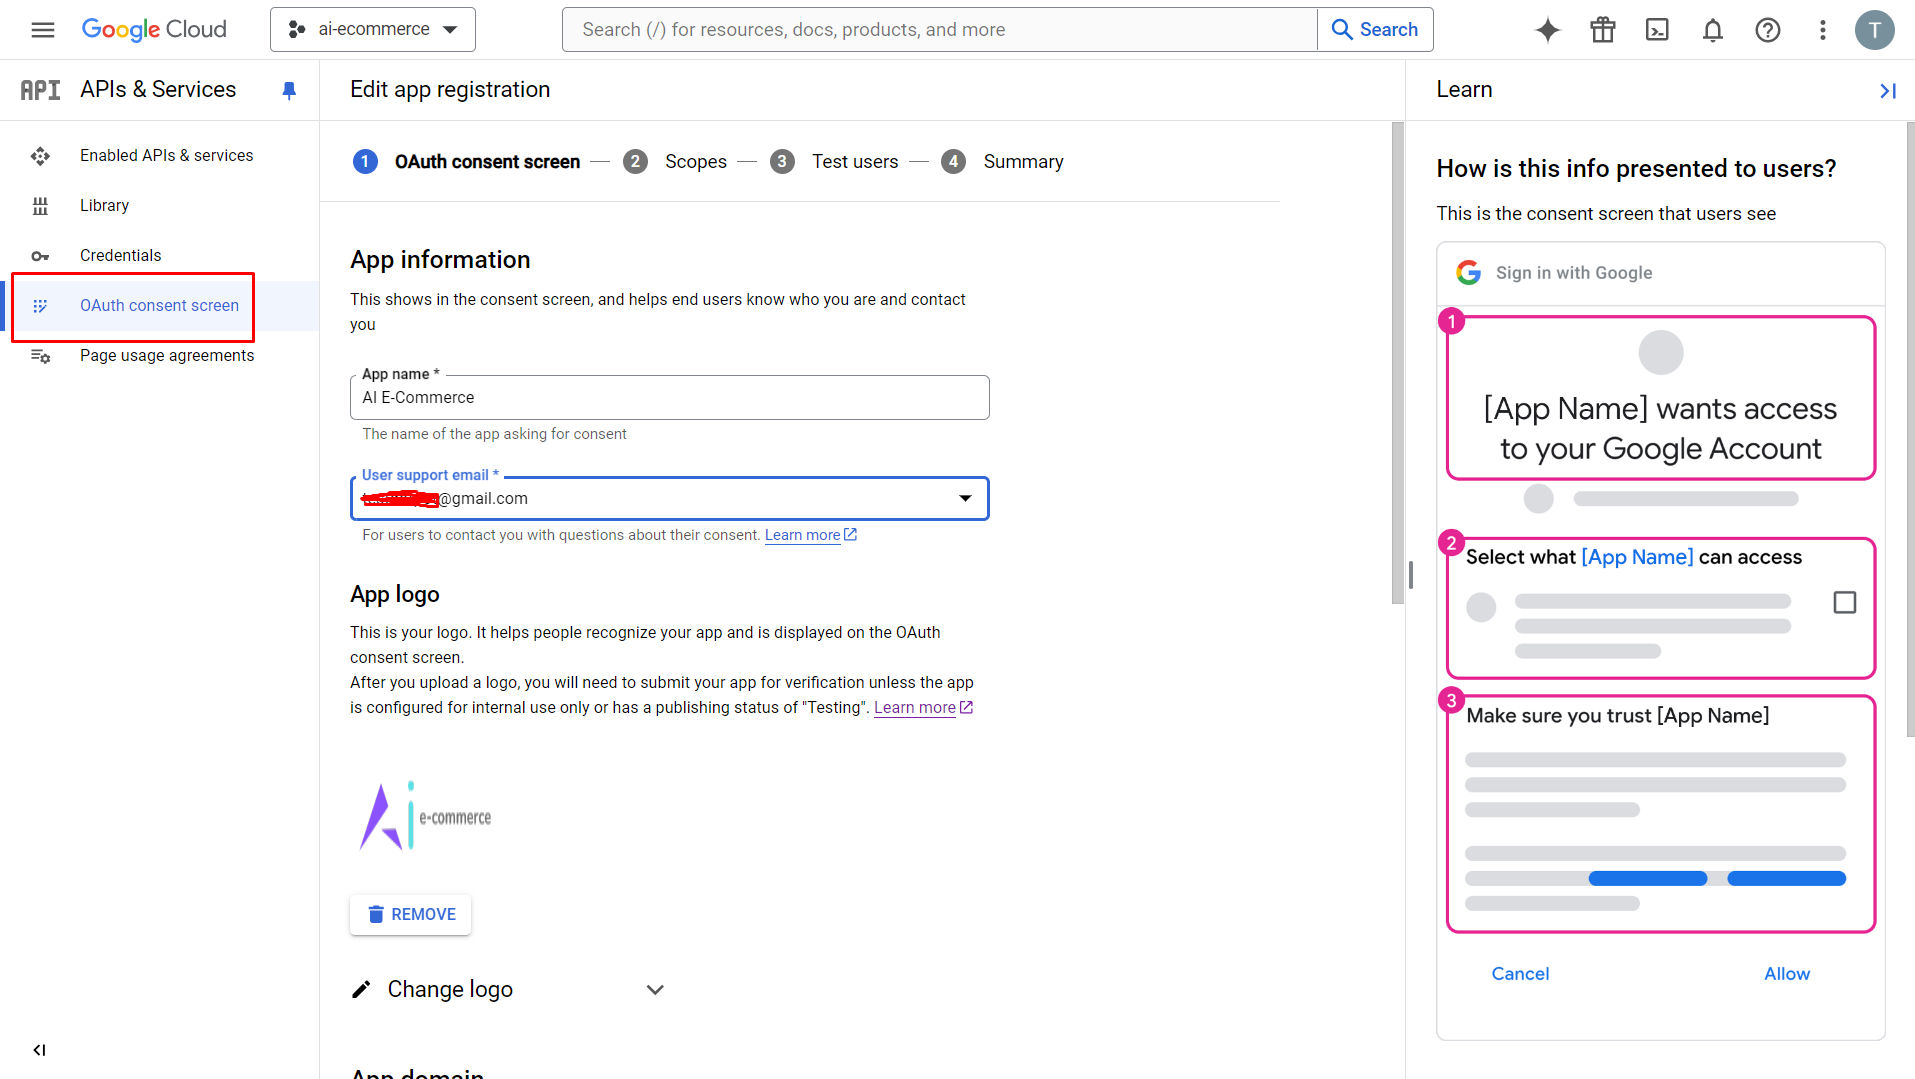
Click on "OAuth Consent Screen" from the sidebar menu.
-
Enter your application information:
- App Name
- Support Email
- App Logo
-
Scroll down and click the "Next" or "Save and Continue" button to proceed.
Step 2: Add Scopes
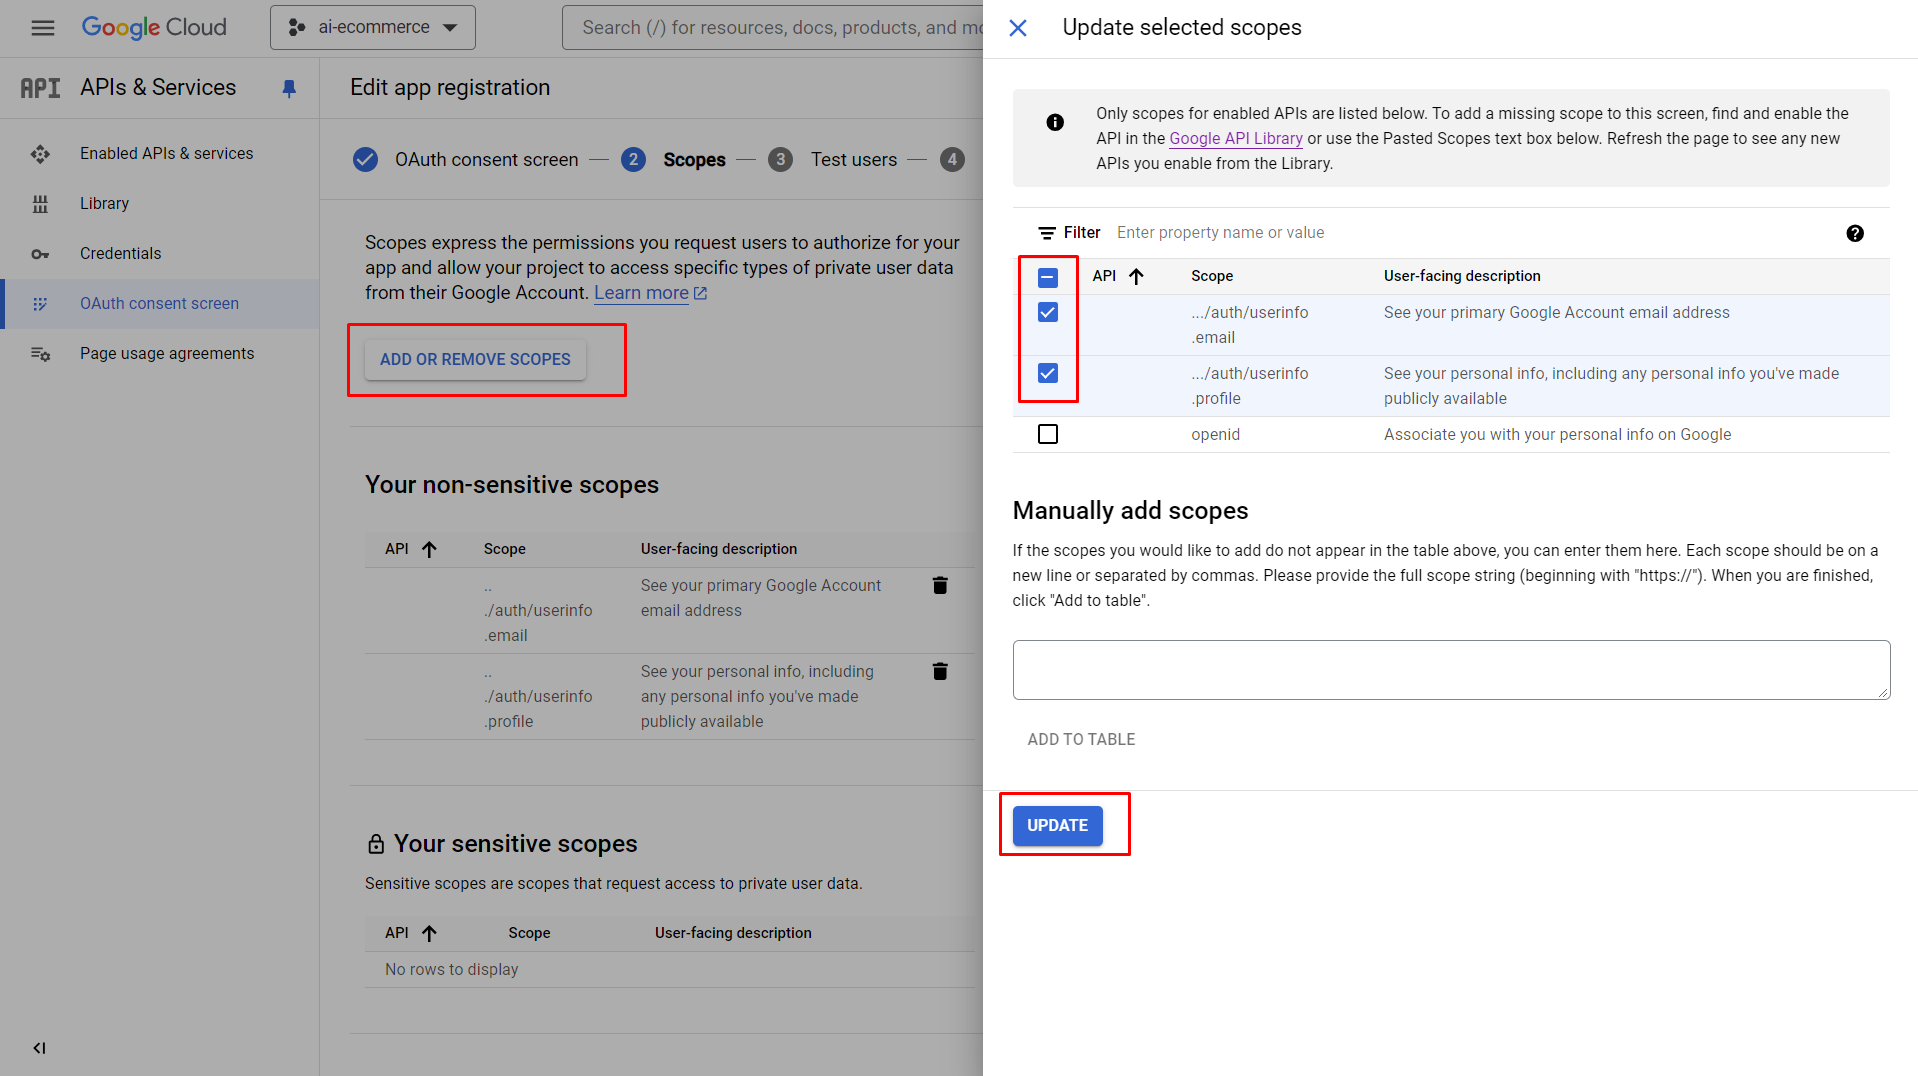
- Click on "Add or Remove Scopes" to manage OAuth scopes.
- Select the required scopes for your application (e.g., email and profile).
- Click "Update" to save your selections.
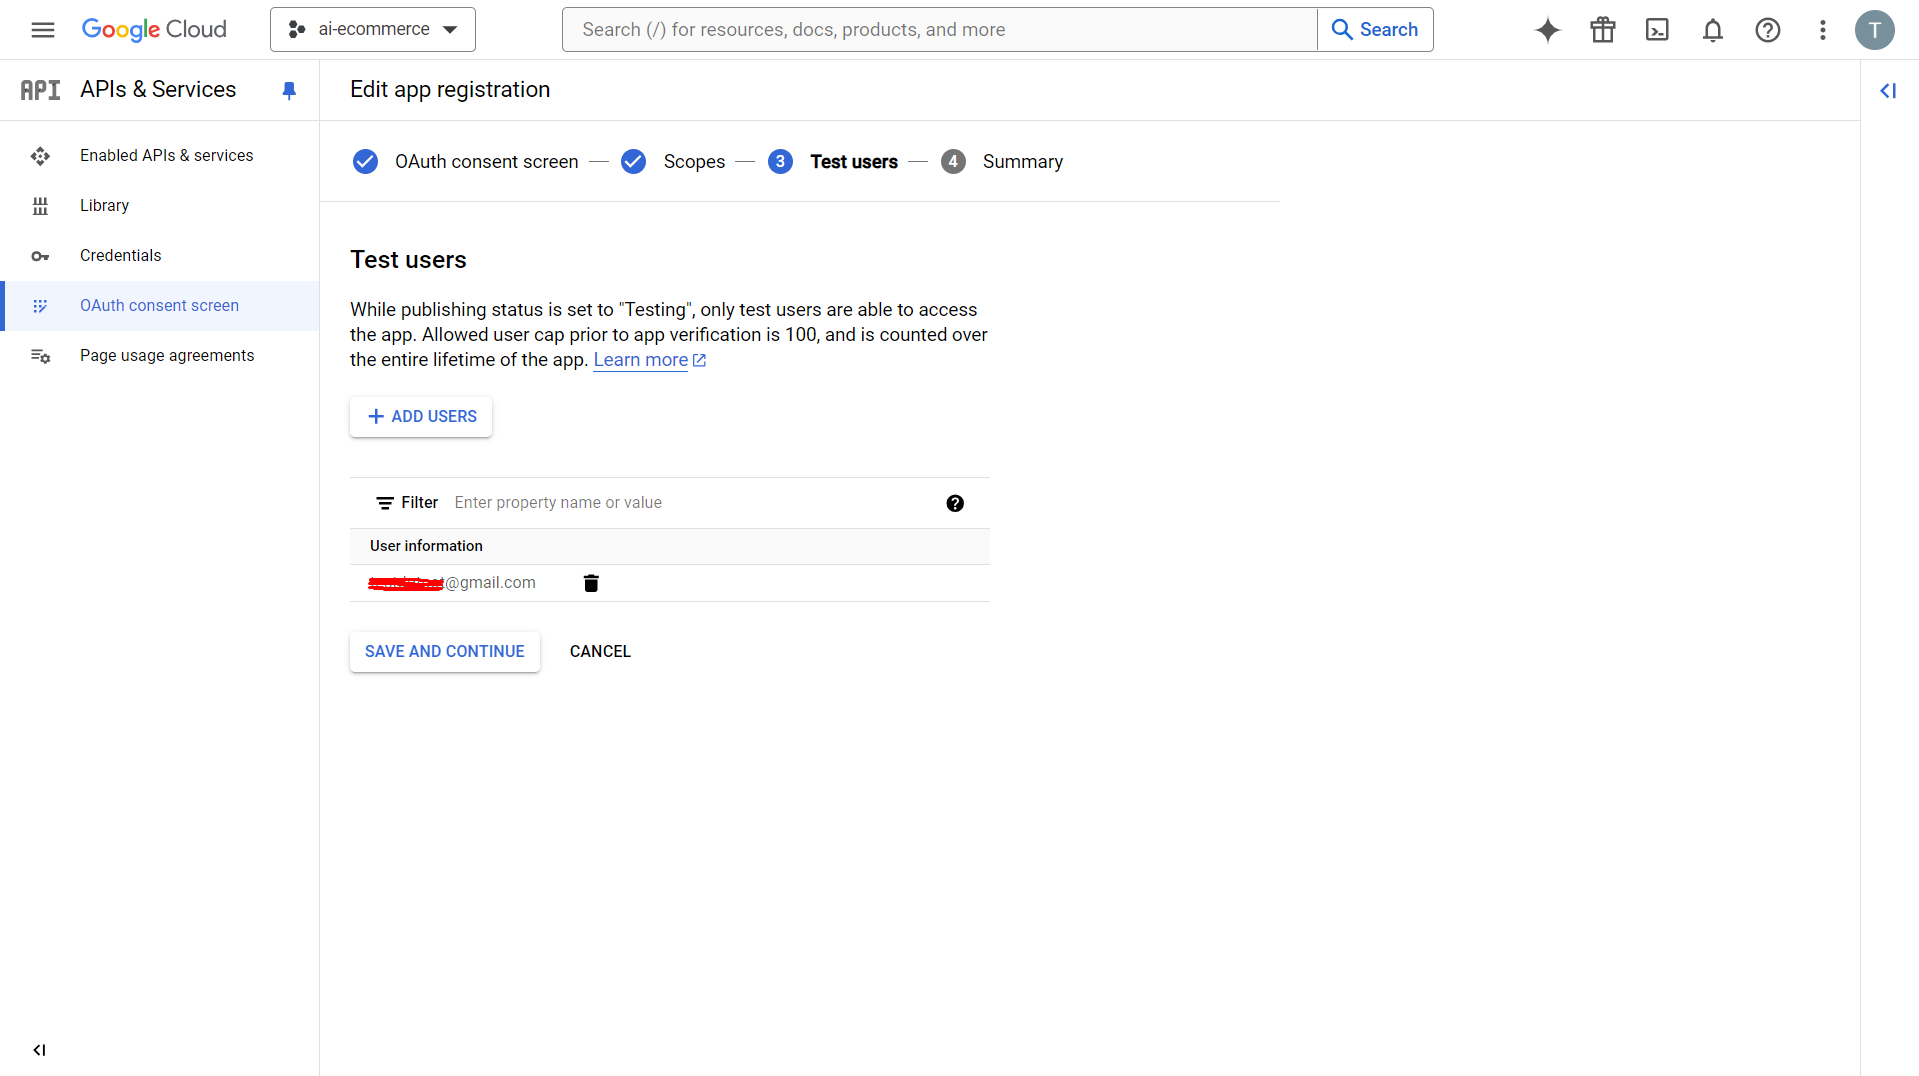
Step 3: Add Test User Email
- Add your email address or any other test email address for testing purposes.
Step 4: Review and Save
- Review the summary to ensure all information is correct.
- Scroll down and press the "Save" button to save your OAuth Consent Screen settings.
By following these steps, you'll successfully configure your OAuth Consent Screen, allowing your application to securely authenticate users via Google OAuth.